COWSHED
Showing posts with label Jenna's Monthly Challenges. Show all posts

Saturday, 2 May 2009

April Lifestyle Challenge: Favourite Gratis Activity

I have many favourite free activities, but one I particularly enjoy is afternoons in the park with friends. Only I don't post photos of my friends here, so some of the deer which also live in the park will have to suffice for this month's challenge.

Deer at Clissold Park


{Image from Author's personal collection}

Wednesday, 29 April 2009

April Photo Challenge: My Favourite Snap this month

blossom 1
{Image from Author's personal collection}

This month's challenge was to take lots of photos and choose my favourite. I know that I have already posted this, but I think this is the one that I like the most.

My second favourite was this one of towels and tea towels drying on my new washing line in the sunshine. I did some more washing this afternoon and what a difference 3 weeks makes. All that brown twiggy stuff is in fact wisteria which is now very leafy and has long purple flowers hanging from it.


Washing on the Line
{Image from Author's personal collection}

Monday, 30 March 2009

'March' Photo Challenge: Signs of Spring

{Image from Author's Personal Collection}

Jenna's challenge this month was to take a photograph which shows what spring means to me. Which says to me that spring has sprung. I thought about this for a while and even took a few snaps of crocuses (or should that be croci?) and daffs poking their little heads up from the earth at long last. I thought about taking some photographs of the buds that have begun to appear on the trees or the blossom that has appeared up and down our road, all of which do indicate that spring is here.

But then I thought I'd try something less predictable: the Spring/Summer '09 Catwalk Show at London Fashion Weekend. Taking photographs of the models on the catwalk is somewhat of a skill, particularly when one is not sat in the optimum position at the end of the runway. Still, I was pleased with this shot as it shows several of the models, some movement in their outfits, which look particularly spring like (and even slightly bridal) and I also managed to get the Spring/Summer sign into the frame as well. The photograph above is unedited and I like the way you can see the audience all looking the opposite way to the models as well as the lights above the runway.


{Springtime, originally uploaded by rachel-catherine}

This is the edited image - well, cropped and re-sized. I am not really sure where to begin with actual editing. Which one is the better photograph do you think?


Posted by Picasa

Monday, 23 March 2009

'March' Lifestyle Challenge: Spring Cleaning

Jenna's March Lifestyle Challenge was to indulge in some spring cleaning. The rules meant that you had to donate some of the items you cleared out and that you had to take before and after photos.
Well, in our house we don't have much storage. This is my desk. What a mess. You can see that I have been busy making wedding related projects: there is my first inspiration board pinned up and swatches of fabric samples. There is a cardboard tube of peacock feathers (and one on the desk for colour referencing). And lots and lots of clutter.

So I tidied up a bit, moved stuff, recycled a lot of paper, newspapers and magazines, put away some of my clothes that were hung on the chair and generally sorted out piles of things. I returned the tagine (just out of shot) to M's brother and wife; I put a glass coffee table on free-cycle and gave it to a girl my age who thought it would be perfect for her flat.

But there wasn't a lot I could do with the bookcase full of books and work from Law School. So I had to leave them in situ. Still, it looks a lot better:

And then I had space for my sewing machine, so I set it up and have been using it each weekend.

Wednesday, 18 March 2009

'March' Food Challenge: Eat Your Greens

Managed to get in a bit earlier with completion of my food challenge this month. The task? To make a salad which was green.

So, here is Rachel & M's Green Bean and Tomato salad:

1. Select green beans and tomatoes. Wash.


2. Cut up tomatoes (in half and then each half into three). Top and tail beans.

3. In a frying pan melt a small amount of butter. Add beans. Add seasoning (I used freshly ground black pepper and Sel de Guerande which I brought back from my last sailing trip). Occasionally stir.

4. After a few minutes try a bean. If it is tasty but still crunchy, add the tomatoes to the pan. Cook for a few minutes to soften them and give them a little colour.

5. Remove beans and tomatoes from pan using a spoon of some sort with holes in, so the melted butter does not sit in a puddle on the plate. (We used the melted butter mixture to cook some other vegetables as soon as we lifted these out of the pan).

6. Place on a plate. Drizzle natural Greek yogurt over the top. Add more freshly ground pepper.

We served this salad with chicken pan fried with chili and hot pepper, grilled peppers and mushrooms (kebab style) and pickled red cabbage in hot pitta breads. It was delicious.


Monday, 2 March 2009

'February' Photo Challenge: Love


Love2, originally uploaded by rachel-catherine.

I found it hard to select a photograph from the ones that I took this month. I didn't want to set out to take a photograph to fulfill this challenge, I just took lots over the course of the month and then chose one.

I found it hard as I wanted to retain M's anonymity as far as possible. This one though spoke to me as the baby in the photo (M's brother's nephew) really took to M and snuggled right up against his chest on our trip to the zoo. It is the first time I have ever seen M holding a baby properly and it did make me rather broody!

Sunday, 1 March 2009

'February' Food Challenge: Something Pink


Pink Pancakes, originally uploaded by rachel-catherine.

Don't they look hideous? For this month's challenge I chose to make something normal and dye them pink with a spot of red food colouring. The oddest thing was despite them looking rather grotesque and as if sweeties should ooze out of them, they actually tasted just like normal.

And here's how to do it yourself if you are brave enough:

In a mixing bowl sieve 135g of self-raising flour, add two tablespoons of caster sugar, half a teaspoon of salt and 1 egg. Whisk together and slowly add 130 ml of milk. Then add a few drops of red food colouring and marvel at how horrid the batter appears. Heat a heavy frying pan with a little oil and when sizzling hot drop in a ladle full of batter. Let one side brown off and then flip over. When cooked slide onto a plate and add a small piece of butter. Repeat until you have a stack, and then eat.
Monday, 2 February 2009

'January' Food Challenge: Chocolate Cake

So, back at the start of January, Jenna laid down some monthly challenges: food, lifestyle & photography. Somehow I managed to not sign up for the photography one, to complete the lifestyle one by default and go skiing without doing the cooking challenge. Some start to 2009.

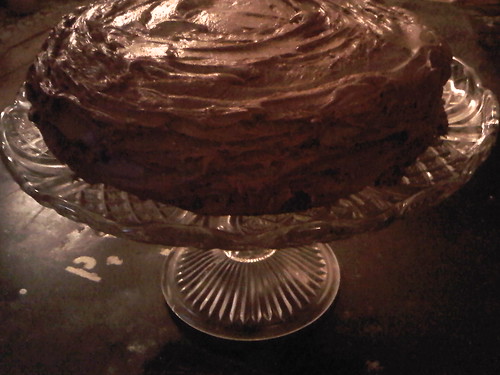
Luckily Jenna agreed to overlook the fact it is technically February and allow me to submit my chocolate cake to the January Food Challenge. Without further ado then I present to you my cake: Nigella's Old Fashioned Chocolate Cake.

{Image by the Author}

And here's how to make it:

FOR THE CAKE:
200g plain flour
200g caster sugar
1 teaspoon baking powder
1/2 teaspoon bicarbonate of soda
40g best-quality cocoa
175g soft unsalted butter
2 large eggs
2 teaspoons real vanilla extract
150ml sour cream

FOR THE ICING:
75g unsalted butter
175g best quality dark chocolate, broken into small pieces
300g icing sugar
1 tablespoon golden syrup
125ml sour cream
1 teaspoon real vanilla extract

METHOD {My additions to the recipe}


1. Take everything out of the fridge so that all the ingredients can come to room temperature.
2. Preheat the oven to gas mark 4/180°C and line and butter two 20cm sandwich tins with removable bases {I used one round cake tin with a removable base and then sliced the cake in two horizontally after cooling}.
3. Now all you have to do is put all the cake ingredients – flour, sugar, baking powder and bicarb, cocoa, butter, eggs, vanilla and sour cream – into a food processor

and process until you have a smooth, thick batter. If you want to go the long way around, just mix the flour, sugar and leavening agents in a large bowl and beat in the soft butter until you have a combined and creamy mixture. Now whisk together the cocoa, sour cream, vanilla and eggs and beat this into your bowl of mixture.
4. Divide this batter, using a rubber spatula to help you scrape and spread, into the prepared tins and bake until a cake tester, or a thin skewer, comes out clean, which should be about 35 minutes, but it is wise to start checking at 25. Also, it might make sense to switch the two cakes around in the oven halfway through cooking time.{As I only used one tin I just dumped all the mixture into one tin and put it on the top shelf of the oven. It also took about another 15 minutes longer to cook than Nigella suggests but that might just be our oven.}
5. Remove the cakes, in their tins, to a wire rack and let cool for 10 minutes before turning out of their tins. Don't worry about any cracks as they will easily be covered by the icing later.
6. To make this icing, melt the butter and chocolate in a good-sized bowl either in the microwave or suspended over a pan of simmering water. Go slowly either way: you don't want any burning or seizing.
7. While the chocolate and butter are cooling a little, sieve the icing sugar into another bowl. Or, easier still, put the icing sugar into the food processor and blitz. This is by far and away the least tedious way of removing lumps.
8. Add the golden syrup to the cooled chocolate mixture, followed by the sour cream and vanilla and then when all this is combined whisk in the sieved icing sugar. Or just pour this mixture down the funnel of the food processor on to the icing sugar, with the motor running.
9. When you've done, you may need to add a little boiling water – say a teaspoon or so – or indeed some more icing sugar: it depends on whether you need the icing to be runnier or thicker; or indeed it may be right as it is. It should be liquid enough to coat easily, but thick enough not to drip off. {I had to add extra sugar to make it stiff enough to use as icing.}
10. Choose your cake stand or plate and cut out four strips of baking parchment to form a square outline on it (this stops the icing running on to the plate). Then sit one of the cakes, uppermost (i.e. slightly domed) side down.
11. Spoon about a third of the icing on to the centre of the cake half and spread with a knife or spatula until you cover the top of it evenly. Sit the other cake on top, normal way up, pressing gently to sandwich the two together.
12. Spoon another third of the icing on to the top of the cake and spread it in a swirly, textured way (though you can go for a smooth finish if you prefer, and have the patience). Spread the sides of the cake with the remaining icing and leave a few minutes till set, then carefully pull away the paper strips.

PS. American readers - if you need any explanations of ingredients or weights/measures please leave me a comment and I shall endeavour to find the translation.